
How to make enamel mug candles

Bring the coziness of a campfire indoors with this fun and simple enamel mug candle project. In this tutorial you’ll learn a few practical techniques and have some fun in fragrance blending. These camping mug candles make the perfect holiday gift for friends and family and are a great addition for your holiday candle line.
Techniques practiced: fragrance blending | determining container size and wax needed | determining wick size
EO Notes: You can also use candle-approved essential oils for this project. Check the recommended usage percentage on the essential oil product page and start with low percentages. How to Make Soy Candles with Essential Oils
Additional Items Needed:
- 2 - Enamel Camping Mugs
- Spatula or Large Spoon for stirring wax
- Rubbing Alcohol
- Paper Towels
Directions:
Step 1: Determine mug size, wax weight, and wick size
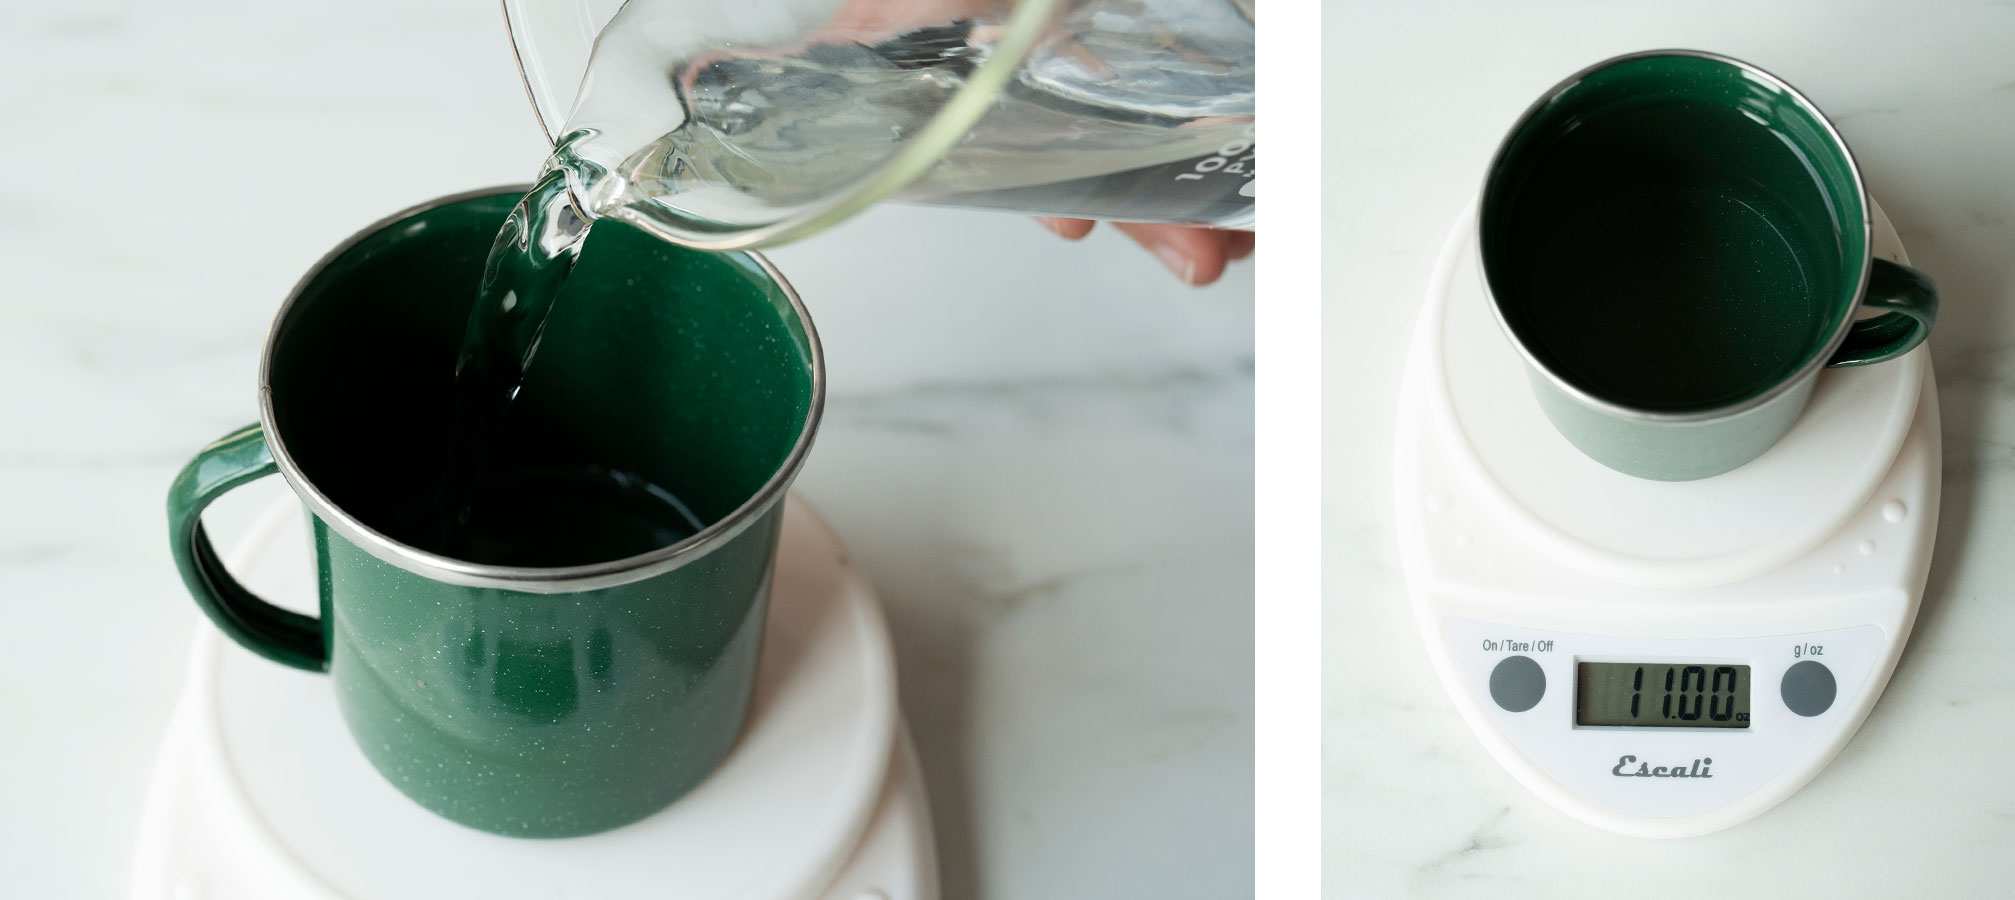
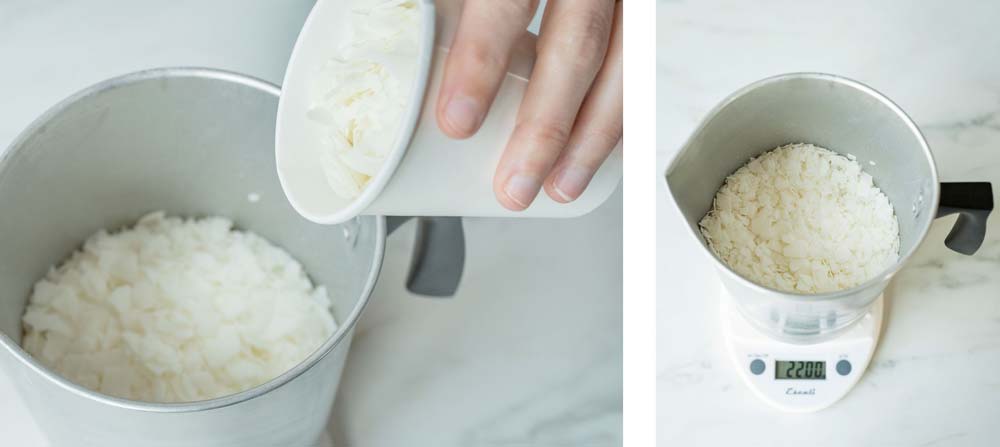
This tutorial uses 12 oz. enamel mugs that we purchased from Amazon. Because we don’t carry these containers, we need to figure out how much soy wax these mugs will hold. You can use this method with any candle container to determine how much wax you will need.
Place the empty mug on your scale, tare the weight, and pour water until it reaches the level you want your wax to reach. We generally recommend the wax fill level to be no less than ½” (13 mm) from the top of your container. The weight of the water is approximately the weight you will need wax. Because wax and water have different densities, you will likely have some wax leftover. For this particular mug, we need 11 oz. (312 g) of wax.
To figure out the best wick series and size for our mugs, we consulted the Wick Guide.
To use the Wick Guide, input the wax you’re using and the diameter of your container. Our mug diameter measured at 3.25’’ (8.3 cm).
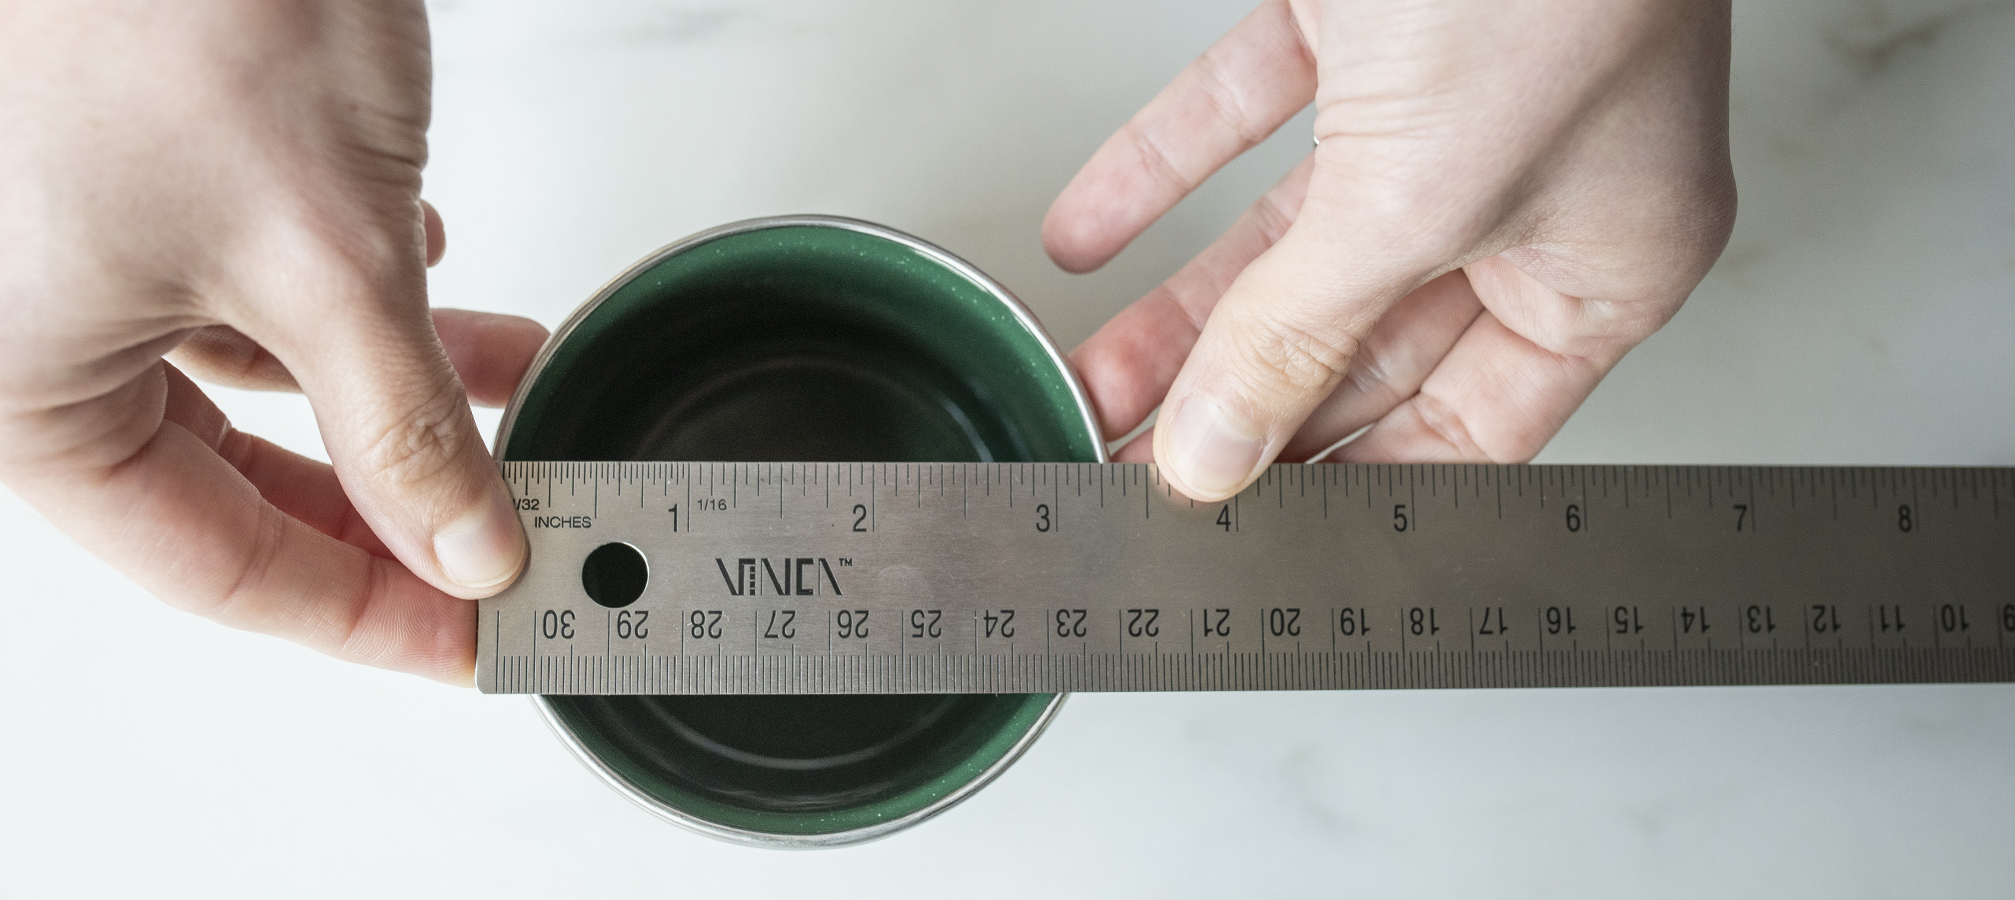
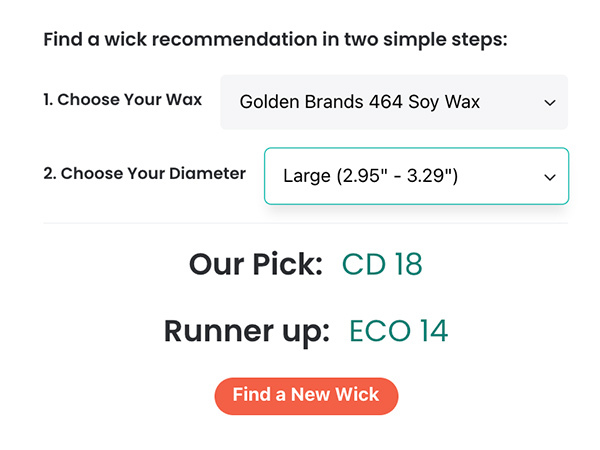
Select your wax and the range of your container diameter from the dropdown menu. We’re using 464 soy wax and measured the mug diameter at 3.25”, which falls into the “large” category. According to the Wick Guide, we need a CD 18 wick for our mug candles.
Step 2: Measure fragrance oil and blend
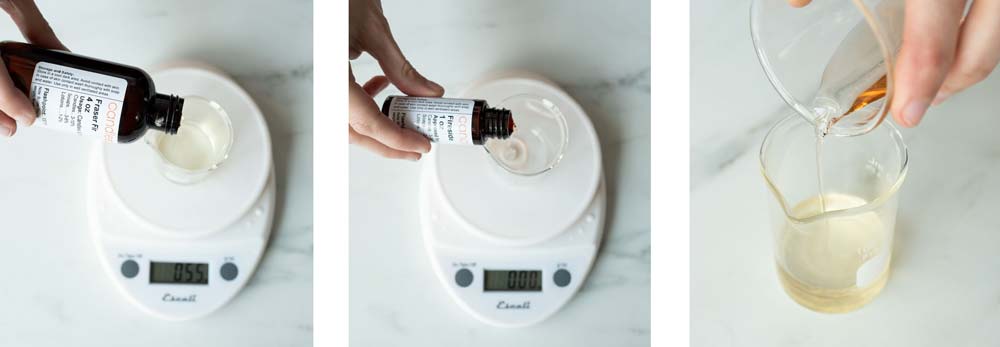
After testing our blend with blotter strips, we chose to use 75% Fraser Fir and 25% Fireside, or 3 parts to 1. We determined we need a total of 1.32 oz. (37 g) of fragrance for our mug candles using this formula:
(oz of wax using) x (% of fragrance oil you want to use) = (oz of fragrance oil needed)
We’re using a 6% fragrance load, but you can adjust up or down according to your preference.
If you’re using our blend, weigh 0.99 oz. of Fraser Fir. (Feel free to round up to 1 oz. or 28 g). Weigh .33 oz. (9 g) of Fireside.
If you’re only using one fragrance oil, weigh 1.32 oz. (37 g) of your chosen fragrance oil.
Mix your fragrance oils together and set it aside. This gives the oils time to incorporate before adding them to the wax.
Step 3: It's Candle Time! Melt wax, wick containers, and pour
Place the large pouring pitcher on your digital scale and tare the weight. Weigh 22 oz (624 g) of 464 soy wax in the large pitcher and set aside.
Begin to melt the 22 oz (624 g) of wax with a double boiler or on a hot plate.
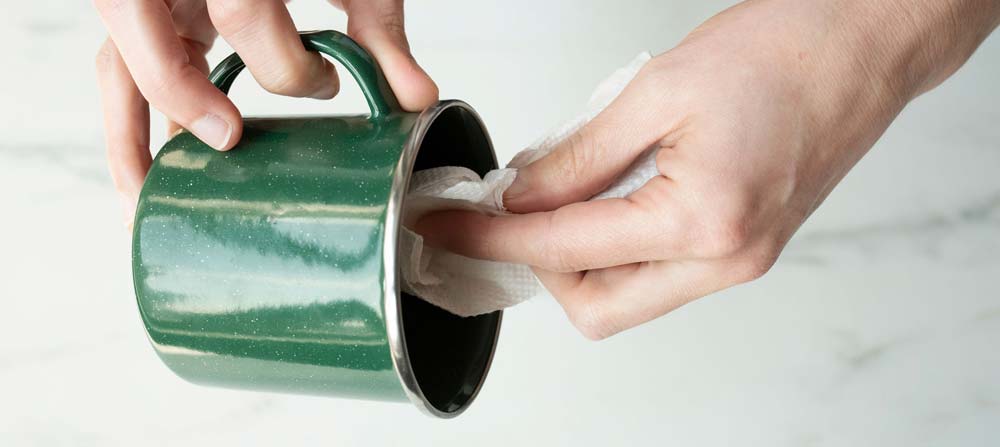
While the wax melts, prepare the mugs. Wipe each mug out with a little isopropyl alcohol and a clean paper towel.
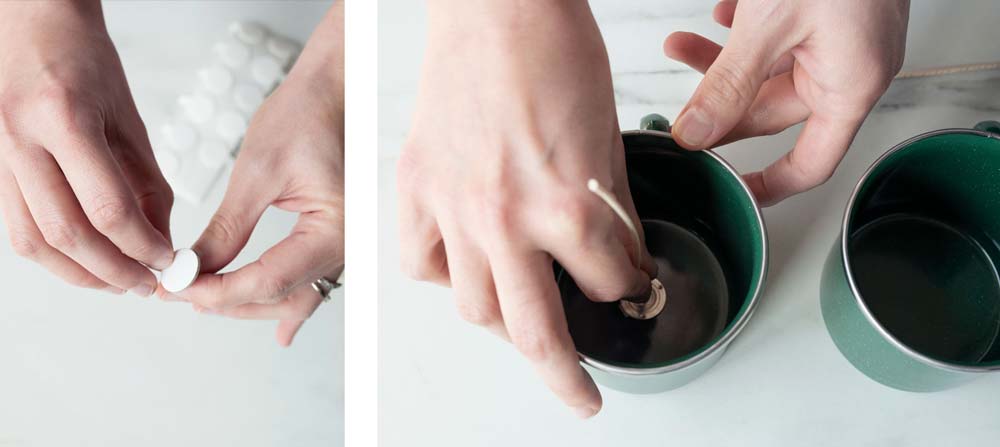
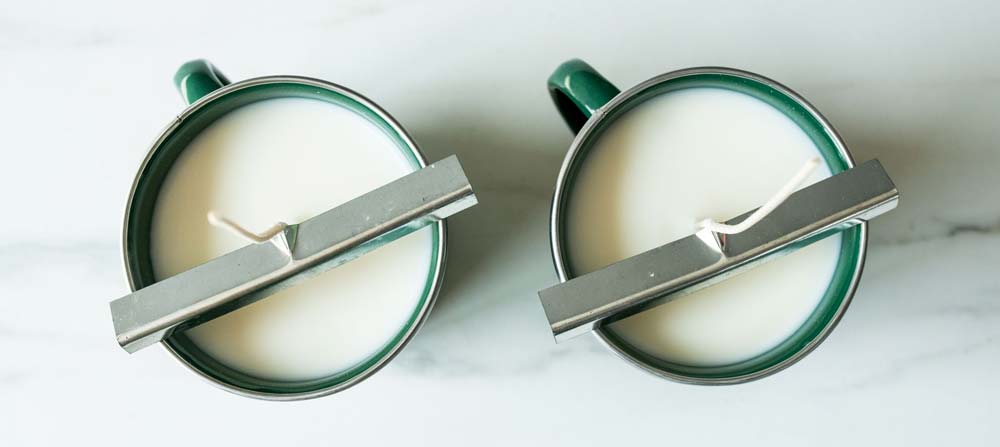
Center one CD 18 wick in the bottom of each mug and secure with a wick sticker.
When the wax reaches 185ºF (85°C), add the fragrance you measured in Part 2 and remove from the heat. Stir gently but thoroughly for 2 minutes to make sure the fragrance binds fully with the wax.

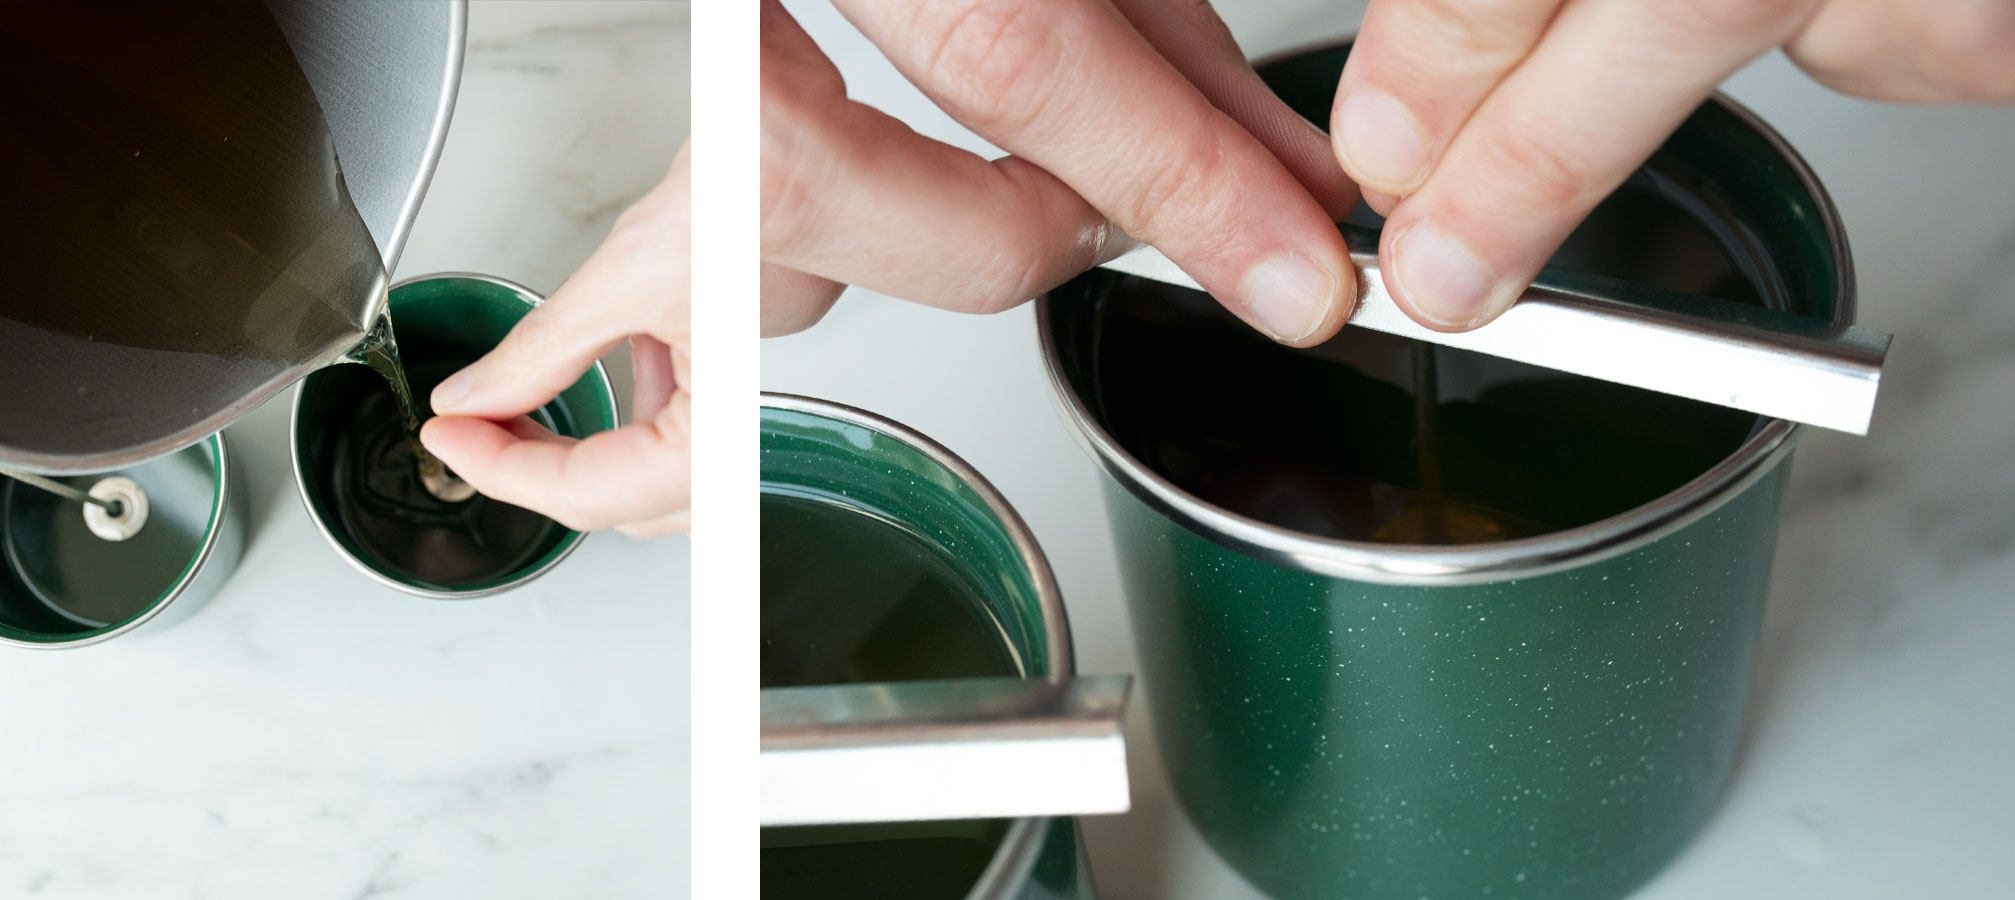
When the wax has cooled to around 135ºF (57.2°C), carefully pour it into the prepared mugs. Use a wick bar to center the wick while the candles cool. Allow the candles to cool completely.
Step 4: Finish and enjoy
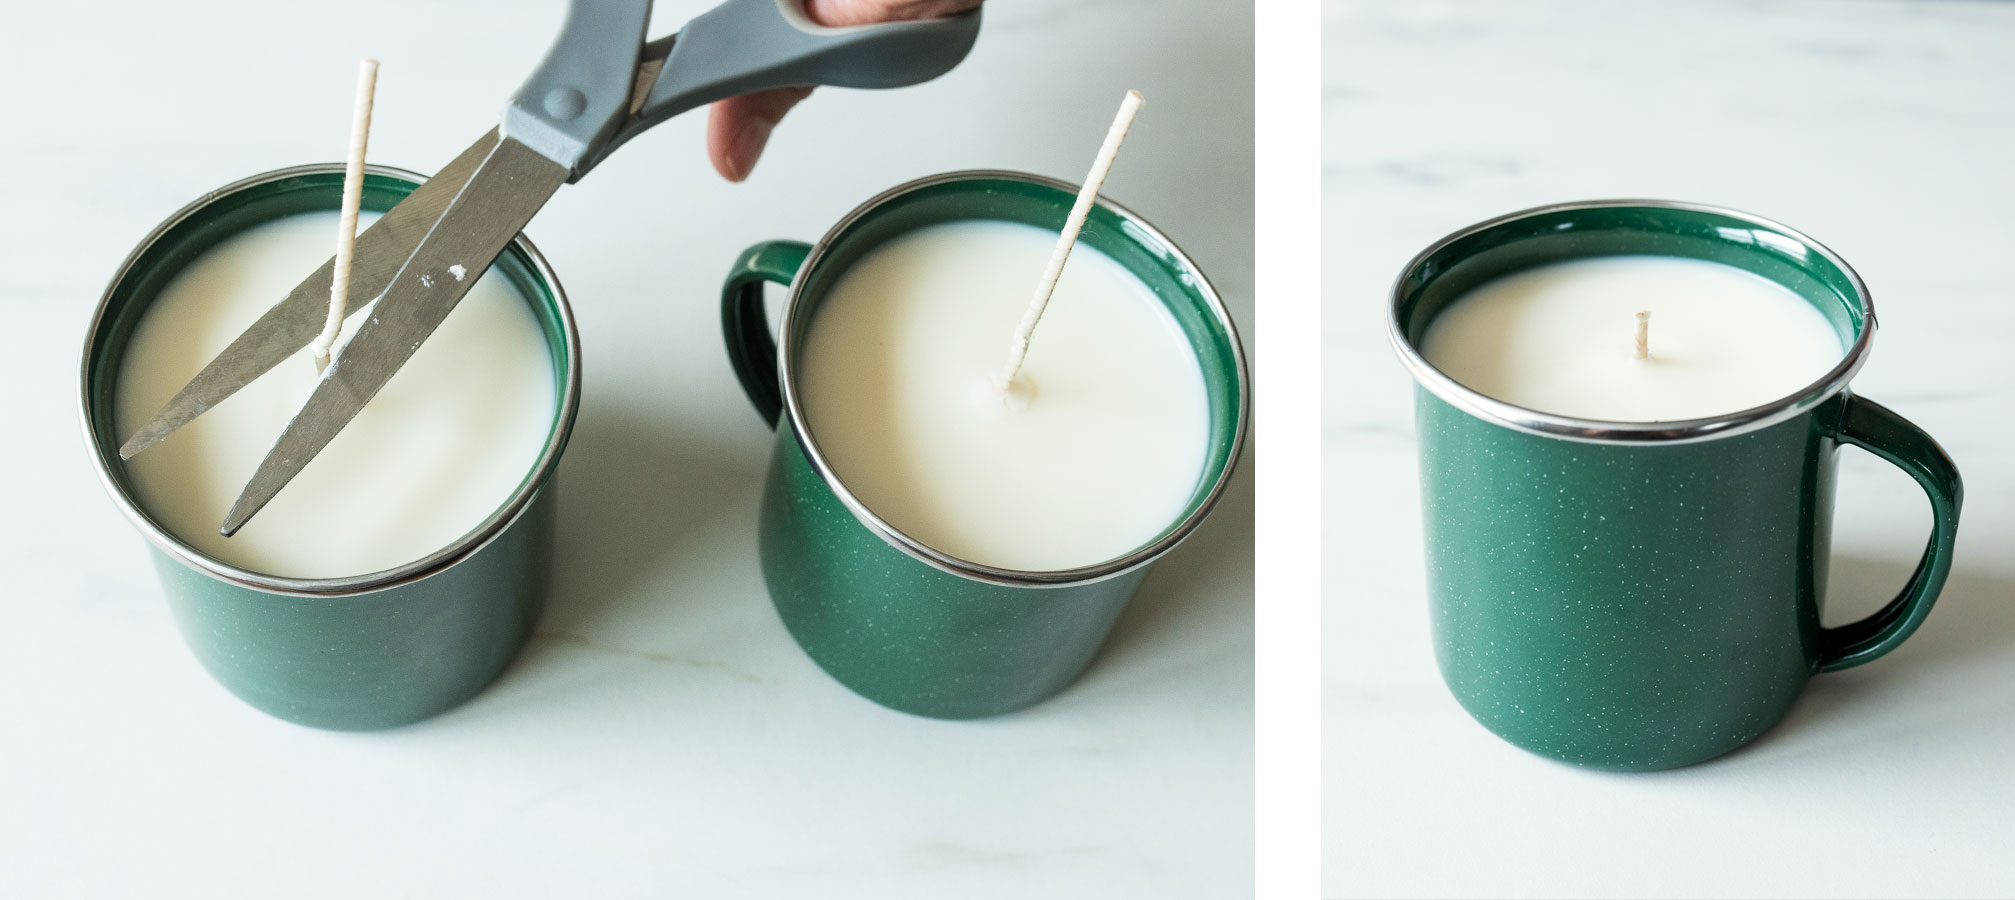
When your Camping Mug candles have set and cooled completely, trim the wick to ¼” (6 mm) and add a warning label to the bottom.
Allow the candles to cure for 1-2 weeks before burning for optimal fragrance throw.
Remember to always follow all candle burning safety rules.
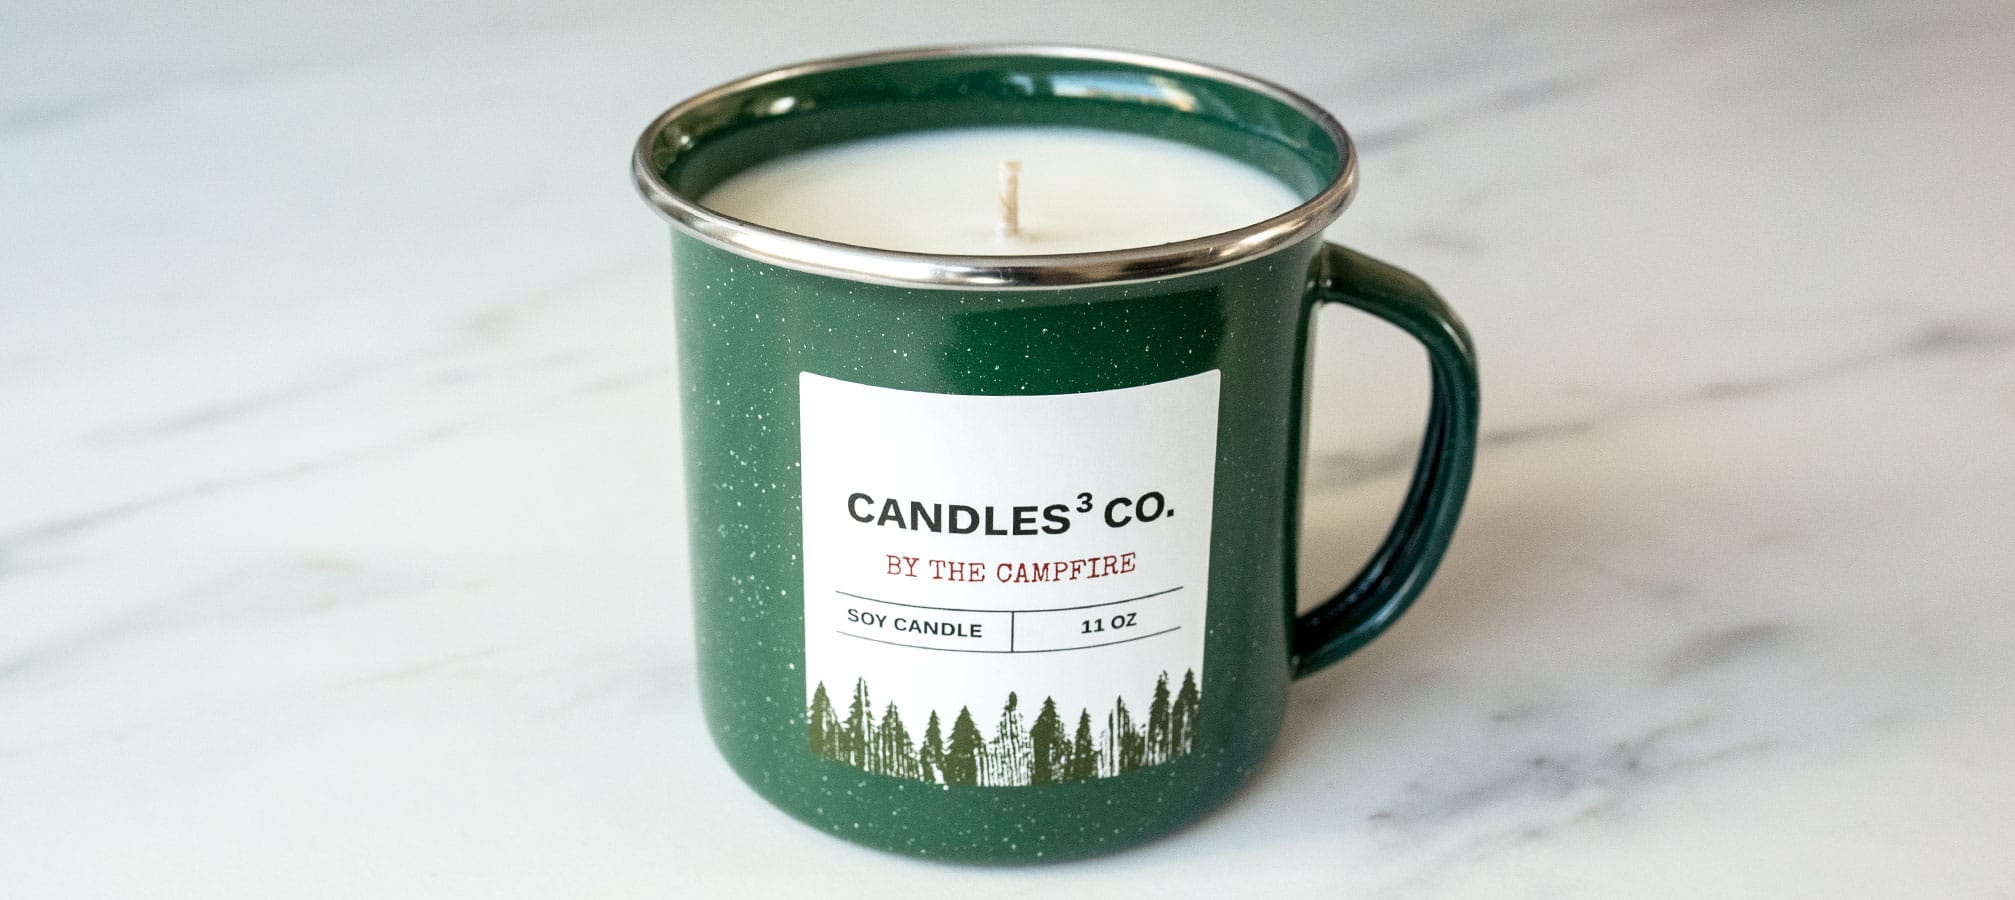
Congratulations! You just made your own Camping Mug candles with a custom scent blend. If you plan on displaying your Camping Mug candles in your home or giving them as gifts, add the special finishing touch of your own label. We designed this camp-inspired label in Avery WePrint—head over to avery.com/candlescience to get started designing your own and take 10% off your label order!